Quick Summary
A used Harley-Davidson inspection is a structured check of paperwork, service records, cold-start engine behavior, frame and steering, and a controlled test ride. Work through these in order, starting with title and VIN verification, before paying. The full process typically takes 45 minutes to two hours.
Last Updated: November 3, 2026
A used Harley-Davidson can look excellent under the showroom lights and still hide costly problems. A structured used Harley-Davidson inspection checklist helps you separate a solid machine from one that will drain your budget in its first year. Buyers often make the same mistake: they fall for paint and chrome, then discover the engine, frame, or paperwork has issues after the sale.
Our approach is simple. Work through the bike in the same order every time: paperwork, service history, cold-start engine behavior, frame and steering, model-specific weak points, a controlled test ride, and finally repair priorities. Each stage can reveal a reason to walk away or a reason to negotiate. The checklist below is built to keep emotion out of the decision.
Most people skip the paperwork and jump straight to the engine. That order is backward. A bike with a salvage title, an unclear VIN, or an open lien is a bike you may not be able to legally register, no matter how well it runs. Verify the paperwork first, then move on to the mechanical checks.
Expect the inspection to take between 45 minutes and two hours, depending on how thorough you are and whether the seller has records on hand. A seller who resists a careful look, rushes you, or refuses a cold start is giving you useful information. Treat that behavior as a warning sign, not an inconvenience.
Start with the title. A clean title means the motorcycle has not been branded as salvage, rebuilt, flood-damaged, or otherwise written off by a state motor vehicle agency. Ask to see the physical title and confirm the seller’s name matches the ownership on record. If the seller cannot produce a title, or the name does not match, pause the deal.
Next, verify the VIN. The number should appear on the frame, typically on the steering head area, and it should match the title and any registration documents. Look for signs of tampering: scratched or re-stamped numbers, mismatched fasteners, or a VIN plate that appears newer than the rest of the frame. A mismatch is a serious red flag that can stop you from registering the bike.
Check ownership history as well. Ask how many owners the bike has had and how long each held it. Frequent changes in a short period can suggest a recurring problem that owners kept passing along. Many states offer VIN-based history reports, and national databases can reveal recalls, theft reports, and liens. Run the VIN before you hand over money, since an open lien means the seller may not have clear legal right to sell.
Finally, confirm the bike is not listed as stolen. A quick VIN check through the National Insurance Crime Bureau or a comparable service takes minutes and can prevent a serious loss. If anything in the paperwork feels rushed or incomplete, ask for time to resolve it before you proceed.
Service records are among the most useful parts of a used Harley-Davidson inspection checklist. A well-documented bike shows consistent oil changes, timely valve and belt or chain service, and records of major repairs. Gaps in the history are not automatically disqualifying, but they mean you should inspect those systems more closely.
Ask for receipts, invoices, and any notes from dealers or independent shops. Pay attention to the mileage recorded at each service and whether it increases logically over time. Unexplained odometer jumps can indicate tampering or a meter replacement, so compare the numbers against the bike’s condition.
Look for evidence of major repairs such as engine rebuilds, transmission work, or frame repairs. These are not automatic deal-breakers, but the quality of that work matters. Ask who performed the repair and whether parts were genuine or aftermarket. A documented rebuild by a qualified shop can be a positive sign, while a vague explanation is not.
Consider the oil change pattern specifically. Harley-Davidson engines are sensitive to neglected oil changes, and irregular intervals are a common cause of premature wear. A seller who can show regular, dated oil service is giving you strong evidence the bike was cared for.
The article’s key checkpoints for service records and their warning signs can be scanned at a glance.
| Item | What to check | Why it matters |
|---|---|---|
| Receipts and invoices | Dealer or shop notes | Shows documented upkeep |
| Mileage at service | Increases logically over time | Unexplained jumps may indicate tampering |
| Major repairs | Engine, transmission, or frame work | Quality of repair affects reliability |
| Parts used | Genuine or aftermarket | Affects value and reliability |
| Oil change pattern | Regular, dated service | Neglected oil changes cause premature wear |
Begin with a cold start. Ask the seller not to warm the engine beforehand, then observe how it starts. A healthy Harley-Davidson should fire within a few cranks and settle into a steady idle. Extended cranking, rough running, or a sputtering start can point to carburetion or fuel-injection issues, weak charging, or valve problems.
Watch the exhaust closely. Light gray or white smoke at startup is often normal condensation burning off. Persistent blue smoke suggests oil is entering the combustion chamber, which points to worn rings or valve guides. Black smoke can indicate a rich fuel mixture. Note the color, volume, and whether it clears as the engine warms.
Listen for unusual noises. A steady, rhythmic mechanical sound that changes with engine speed warrants a closer look. Knocking, ticking that gets louder under load, or grinding sounds from the primary or transmission should be investigated. Have the seller rev the engine gently while you listen from a short distance.
Inspect for oil and fluid leaks. Check beneath the engine, around the cylinder heads, the primary cover, the transmission, and the final drive. A few drops of seepage may be acceptable on an older bike, but active leaks mean repair costs. Place a clean paper towel under the bike for a few minutes to reveal slow drips.
Examine the frame carefully, looking for cracks, especially at welds and mounting points. Check the area around the swingarm pivot, the engine mounts, and the steering head. Any cracking, fresh weld repairs with uneven beads, or paint that does not match nearby sections can indicate prior crash damage.
Check steering-head alignment. Sight down the frame from the front and rear to see whether the wheels line up with the centerline. A bike that tracks crooked or pulls to one side may have a bent frame or steering-head problem. Turn the handlebars from lock to lock and feel for binding or notchiness.
Inspect the forks closely. Look at the fork stanchions for scratches, pitting, or bends, since even small damage can ruin the seals. Check for oil streaks or dampness around the fork seals, which signal leakage. Compress the front suspension by hand and watch for smooth, controlled movement rather than sticking or uneven travel.
Look for evidence of a rear shock or swingarm issue as well. Push down on the rear of the bike and observe whether it rebounds evenly. Oil on the shocks or uneven ride height may mean the suspension needs service.
Inspection priorities change by model family and model year, and the most useful thing you can do before a visit is look up the specific service information for that machine. The National Highway Traffic Safety Administration maintains a recall lookup by VIN. Check it before you inspect, because a recall that was never performed is a repair the seller may not know about and a cost you may inherit.
Red flags that cross model lines include a seller who avoids a cold start, mismatched or aftermarket components that lower value, unexplained stalling, and inconsistent odometer readings. Electrical symptoms such as flickering lights, a battery that drains overnight, or a check-engine light that appears only when warm deserve attention because wiring and module repairs can be costly. Be cautious with heavily modified bikes: aftermarket exhausts, suspension, and custom wiring can complicate warranty coverage, emissions compliance, and resale, so ask for documentation and confirm the work was done professionally.
A clean-looking bike with an open safety recall still needs that recall completed, and the cost and downtime fall to you once you own it.
A test ride is the final mechanical check, and it should follow the same route and the same sequence every time so you can compare bikes fairly. Wear a DOT-approved helmet, boots, gloves, and a riding jacket. Confirm the bike is registered and insured for the ride and that you hold a valid motorcycle endorsement. If any of that is unclear, ride only in a closed lot at low speed.
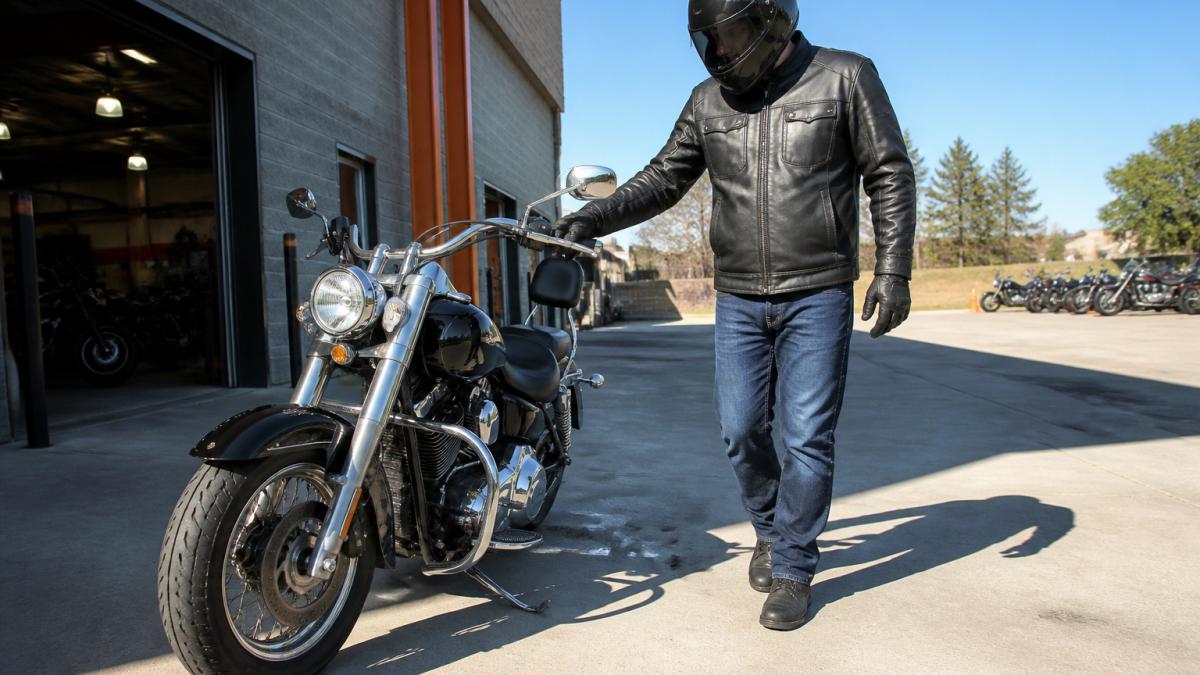
Before you ride, do a static check. With the engine off, squeeze the front brake and push the bike forward to confirm the brake holds. Roll the bike and listen for brake drag or wheel bearing noise. Turn the bars lock to lock and confirm the throttle returns freely and the clutch lever has a consistent friction point. Check tire pressures against the placard and note the tire date codes.
Start in a parking area at walking speed. Apply the front and rear brakes separately and together, noting any pull, grab, or spongy lever. Release the clutch slowly in first gear and feel for chatter or a friction point that is very high or very low. Shift up and down through the gears at low speed and listen for clunks, missed shifts, or a neutral that is hard to find.
Move to a quiet road and ride a fixed loop: a straight section, a gentle curve in each direction, a stop, and a low-speed U-turn. On the straight, accelerate moderately and note whether the bike tracks straight with light pressure on the bars and whether vibration changes with engine speed. On the curves, feel for resistance, wandering, or a tendency to stand up under braking. At the stop, confirm the brakes are progressive and the bike does not pull to one side.
Note the engine temperature gauge behavior and any warning lights that stay on. After the ride, let the bike idle and listen for new noises, then check for fresh leaks under the engine, primary, and final drive. A second cold start after the bike cools can reveal starting issues a warm engine masks.
Do not ride if the brakes are weak or inconsistent, the steering binds, the tires are visibly cracked or underinflated, the bike will not shift reliably, or you see active fluid leaks. Those are reasons to stop and have a technician inspect before any further riding. Consistency across bikes is what makes the test ride useful, so keep the same route and the same checks for every machine you evaluate.
A pre-purchase inspection by an independent mechanic is worth paying for when the bike is expensive, the history is incomplete, or the purchase is from a private party. A qualified technician can scan for diagnostic codes, measure compression, check final drive play, and evaluate components you cannot judge by eye. Pricing varies by shop, so ask for a quote before booking.
Choose a shop with real experience on Harley-Davidson motorcycles. Ask whether the technician has worked on your specific engine family and whether they will provide a written report. Bring the inspection checklist and the service records so the mechanic can focus on areas of concern.
Consider an inspection especially if you see a bike that looks clean but has a vague history, or if you are buying from out of the area.
Once inspection is complete, sort the findings into three groups: safety-critical, reliability-related, and cosmetic. Safety-critical items include brakes, tires, frame damage, steering problems, and lighting. Reliability items include oil leaks, charging faults, and worn clutch or transmission components. Cosmetic issues include scratches, faded paint, and minor dents.
Estimate repair costs honestly. Get written quotes for anything significant, and factor them into your offer. A bike that needs new tires, brake pads, and a fork seal job may justify a noticeably lower price, even if it looks good overall.
Negotiate with specifics rather than general complaints. Instead of saying the bike is overpriced, point to the documented need for tires, the oil leak at the primary cover, and the cost of a fork seal repair. Be prepared to walk away if the seller will not account for real problems.
Keep emotion out of the final decision. The cheapest bike is not always the best value, and the nicest-looking machine can hide expensive faults. A disciplined used Harley-Davidson inspection checklist protects you from both traps.
If you are weighing a used bike and want to see how it feels before you commit, you can schedule a test ride and evaluate a machine under the same protocol described above.
You can also view our new Street Glide Limited inventory if a new bike suits your plans better than a used one. Riders who already own a Harley-Davidson and need professional checks or maintenance after buying can learn how to book a motorcycle service appointment online.
If you are still deciding on a model, our guide to choosing a first Harley-Davidson covers the trade-offs between sizes, weights, and riding styles. For a broader comparison of cruisers across model years, read how to choose the best cruiser motorcycles.
National Insurance Crime Bureau VIN and theft verification resources
NHTSA recall lookup by vehicle identification number
Watch for a title that is branded, salvage, or missing, VIN plates that do not match the paperwork, and sellers who cannot produce service records. Other warning signs include oil residue around the engine and primary cover, blue or white exhaust smoke on cold start, fork seals that are wet or leaking, frame welds or repainted areas that suggest crash repair, and a seller who discourages a test ride or independent inspection. Any one of these justifies a closer look or walking away.
Start with paperwork: confirm the title, VIN, and ownership history, and check for recalls and liens. Then inspect the engine for cold-start behavior, smoke, and leaks; the frame for cracks or crash damage; the steering head for play; the forks for seal leaks and stanchion scratches; the tires for tread depth and date codes; the brakes, chain or belt, lights, and electrical system. Finish with a test ride on a route you can control, paying attention to noises, vibration, and braking.
No single model year is universally bad, so judge each bike on its condition and documented history rather than the year alone. Research known recalls and common issues for the specific model year and engine family, then verify that any recall work was completed. A well-documented later model in good condition is often a safer buy than an older one with missing records and signs of neglect.
For most buyers, yes. An independent mechanic can check compression, leak sources, frame alignment, and electrical faults that are hard to judge in a driveway. Pricing varies by shop, so ask for a quote before booking. If a seller refuses to let a mechanic look at the bike, treat that as a red flag.
Ask for receipts, dealer invoices, and any service logs, then match the mileage and dates against the service intervals in the owner’s manual. Look for regular oil changes, valve and belt or chain maintenance, and brake and tire replacement. Gaps in service history are not automatically disqualifying, but they mean you should budget for a fuller inspection and possibly immediate maintenance.
Common failure points include worn or unsafe tires, brake pads or rotors below minimum thickness, lights or turn signals that do not work, excessive fluid leaks, a loose or damaged chain or belt, steering-head play, and frame damage. Requirements vary by state, so check the rules that apply where the bike will be registered before assuming a bike will pass.
The most frequent causes are worn tires, weak brakes, inoperative lights and signals, visible fluid leaks, exhaust modifications that are not compliant, and unrepaired damage to the frame or safety-critical components. Cosmetic issues such as chrome or paint rarely cause failure on their own. Fixing the safety items first keeps repair costs focused on what actually matters.
Look for written answers to specific questions, a clear out-the-door price, and a willingness to let you inspect the bike and take a test ride. Ask what inspection and reconditioning the bike received before listing. Grand Canyon Harley-Davidson publishes current pricing on its website, so you can request a written quote before you visit and compare it against what you see in person.
While great effort is made to ensure the accuracy of the information on this site, errors can occur. Please verify all pricing and installed equipment information with a customer service representative. This is easily done by calling us or visiting us at the dealership.
We improve our products and advertising by using Microsoft Clarity to see how you use our website. By using our site, you agree that we and Microsoft can collect and use this data. Our privacy statement has more details.

Save your favorite vehicles for later viewing on your desktop or mobile devices.
Keep track of all the vehicles you've viewed for a better car shopping experience.
Narrow your search by comparing your favorite vehicles.


